Fixing a stalled OSX software update

When I recently run Software Update on my MacBook Air I found it would stall at about the 10% mark during the "Checking for new software" phase. Below is a screenshot of what I mean by this:

A check of Activity Monitor showed that the problem was not caused by any network issue, in fact Software Update was not even trying to connect to the Internet. Fortunately this Apple support discussion page lead to the answer.

The problem appears to be caused by a corrupted, user-level software update cache file. To resolve delete the Cache.db file from your Library/Caches/com.apple.SoftwareUpdate directory. Once trashed repeat the software update process and all should be back to normal.

The discussion thread also discussed an interesting command line tool for performing OSX software updates. To perform a software update from the command line execute the following command (your password is required for sudo privileges):

sudo softwareupdate -i -a

This will run a fully automatic software update process, and once complete prompt you to restart the computer if required. Whilst a niche tool, it is a handy command to know about when performing remote OSX administration:


Loose some OSX fat with Xslimmer

These days disk space is not a huge problem, but on a MacBook Air it can get a little tight once all your applications and media libraries are installed. This dilemma is not helped by OSX 10.5 Leopard's installation bloat. Not only is multiple language support installed by default, but most applications come with both x86 and PowerPC binary files. So if like me you only understand English, removing superfluous languages and binaries will free gigabytes.

Now whilst it is possible to do this task manually it is hardly fun or a good use of one's time. Fortunately there are a few tools out there that can do the job for you, my favourite being Xslimmer. Whilst this application does cost a handful of dollars (US$12.95) it has a great interface and keeps a 'blacklist' of applications that experience issues when they are placed on a diet, for example Skype. Plus if it helps remember that for this money you are reclaiming storage space, so it could be argued $13 is a very small price to pay when your laptop's hard drive cannot be replaced and external USB drives look ugly.

Using Xslimmer is very easy, simply open it and run the Genie command to automatically locate all your applications. Once found Xslimmer will analyse each program to determine what excess fat can be trimmed. This usually results in a 25%-50% reduction in application size. This soon adds up to gigabytes of space on a typical OSX installation. Once analysis is complete you can choose to backup all unnecessary files or just delete them entirely. After this decision is made Xslimmer quietly gets on with the job, which for me resulted in 2.5 gigabytes of storage being freed (approximately US$5.20 per gigabyte).

The only thing to keep in mind is that as software updates and new applications are installed new fat will be introduced to the system. This means if you want to keep your system nice and lean re-runnig Xslimmer every few months is a good idea.


Perian - the ultimate Quicktime add-on

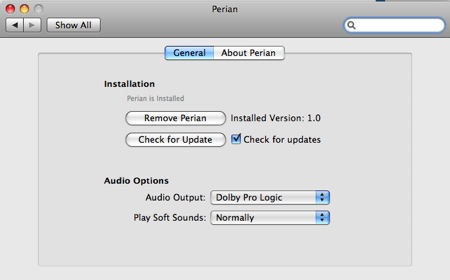
With recent releases of Quicktime and OSX Leopard Apple has removed the need for most people to purchase the professional version of Quicktime to do simple things like play video in full screen. This is a great development but it still doesn't address the fact that as a video player Quicktime is limited in the number of video codecs it supports out of the box. Fortunately Perian is a fantastic Quicktime extension which handles the installation and updating of a range of third-party codecs (including DivX) through one very simple interface. A great tool that when combined with the Flip4Mac Player provides gives Quicktime the ability to play almost anything you can throw at it.


Automounting Samba shares in Leopard

Edit 15th November 2007: After a few weeks of use I have found the automount technique described here is a little unreliable not only from the perspective of keeping the mount point active but also for maintaining the correct file permissions. This maybe addressed in future OSX 10.5 updates but for the time being using user-level mounts via Finder or Go -> Connect to Server is more reliable. To automatically mount a volume save the mount point as a Favorite (Go -> Connect to Server -> Add favorite) and then drag this favorite (stored in ~/Library/Favorites) to the Login Items under Account Preferences.


Apple have pleased a number of people by laying to rest the NetInfo Manager in OSX 10.5 'Leopard'. Many of the functions performed by this Registry-like tool have been incorporated into the far tidier Directory Utility tool. Unfortunately whilst this tool includes the ability to define automounted NFS shares the same capability is not provided for Samba. This is a pain because if you have a couple of Samba servers on the network that need to be connected all the time, a good example being a network share for iTunes music.

Fortunately all is not lost as we can still edit the automount configuration files directly so that our Samba shares are always accessible. To start with open up the Terminal application as an administrative user and then use sudo to create a bash shell.

sudo bash (enter)

You will be prompted to enter your administrator password at this point.

We will now create a file entitled auto.smb in the /etc/ directory to hold our server details.

pico /etc/auto.smb (enter)

In this file enter the following line (add more lines for extra servers/shares) 

$Sharename -fstype=smbfs ://$Username:$Password@$Server/$Share

Where:

$Sharename = the name you want to give the mount point
$Username = the user to connect to the server as
$Password = password of the user
$Server = the name of the server (dns/wins entry)
$Share = the name of the share on the server

As this file stores the username and password to the server in plain text set the permissions of the file so that only the root user can read it.

chmod 600 /etc/auto.smb (enter)

Now edit the /etc/auto_master file and append the auto.smb record at the end of the file. The auto_master file controls all the automounts for the system, leave everything about this file alone except for the extra line at the end. 

pico /etc/auto_master (enter)

#
# Automounter master map
#
+auto_master # Use directory service
/net -hosts -nobrowse,nosuid
/home auto_home -nobrowse
/Network/Servers -fstab
/-  -static
/Users/Resources auto.smb

This will tell the automounter to mount the shares defined in the /etc/auto.smb file under the /Users/Resources directory. So for example if auto.smb defined a Music share we would end up with /Users/Resources/Music. Note: You do not have to use /Users/Resources.

With the configuration files in place it is now time to tell the automounter to refresh the settings. Exectute the following command:

automount -vc (enter)

If all goes well you should see the following output from this command:

automount: /net updated
automount: /home updated
automount: /Users/Resources updated
automount: no unmounts

Now you should be able to open the Finder and see a /Users/Resources directory that lists (and magically takes you to) all the network shares you have defined in the auto.smb file.

Hopefully this is only a temporary fix and Apple includes the option to mount Samba as well as NFS shares in Directory Utility. Technically it is not hard to do and the end result would be far tidier. 

Keep your OSX apps updated with AppFresh

AppFresh is a very useful and user-friendly software update tool for OSX. Although Apple includes a very capable Software Update utility within OSX it is only made available to Apple applications. This leaves the thousands of other applications built for the operating system out in the proverbial cold. As a consequence unlike Linux with its powerful apt, rpm, yum and yast tools, keeping all of your OSX software up to date is a manual affair. To ease the burden of users many OSX applications now include their own update checking routines which is handy but hardly a great solution as it often means being interrupted during your working day with the message that you need to update the application right now.

AppFresh is a breath of fresh air when it comes to software updating in OSX. Currently it is in active development and a preview version is available for free. AppFresh leverages the iusethis.com database to determine whether your system's applications are up to date. This is a brilliant solution to the problem of determining software availability as it places the burden of data collection on the user-base and not a single party.

Is this the end of iLife as we know it?

iLife is Apple's general purpose package for working with digital photos, video, audio and the Web. It usually receives an update every year around January/February but this year has been different. MacWorld came and went without a peep, leading to the general feeling that iLife would be released at the same time as OSX Leopard. But a few things have happened which suggests to me that iLife as we know it will cease to exist and its component applications will be absorbed into OSX Leopard:

Feature Parity with Windows Vista

The first reason lies in OSX's need to maintain feature parity, if not superiority, over Windows Vista. Whilst Apple have been quite vocal about Microsoft's feature copying in the past it would seem that Vista has digital media functionality currently lacking within OSX. This functionality ranges from the ability to manipulate digital photographs directly within the Windows Explorer through to the far more capable Movie Maker shipped on the Vista DVD. In contrast OSX needs the optional iLife package to provide this capability and as a consequence the degree to which OSX's default interface has been tailored to handle digital media is limited.

Functionality already present within developer builds of Leopard

A hint of forthcoming Leopard/iLife intergration has been illustrated in the latest developer build of Leopard. This build includes a 'Media' link in the Finder for displaying resources managed by iMovie, iPhoto and GarageBand. This kind of functionality is currently present within applications such as Pages and Keynote when iLife is installed but the fact it has made an appearance within the operating system suggests this tool-set will be far more ubiquitous in the future.

What else can Apple do to iLife?

The other problem that Apple must be facing is the looming question of what else to do to iLife to justify an upgrade. Numerous application iterations has seen its functionality reach a level where not a lot can be added without risk of eroding the lower end of Apple's professional application market. Where else can Apple go with iLife except for deep integration into Leopard alongside a healthy dose of Core Animation? By bringing together iLife's current capabilities, Core Animation's aesthetics and OSX's renowned ease of use Apple would create the 'complete package' discussed in the MacWorld keynote. Such a strategy would certainly provide them with some significant ammunition to fire in their war of words against Windows Vista.

Will it happen? Maybe not, but at least a number of other people are of the same opinion as myself which can't be a bad thing. I guess time (and Steve Jobs) will tell...

Parallels update brings Windows CAD to the OSX desktop

Parallels released an update today for their Parallels Desktop for Mac virtualisation software which introduced 'coherence' mode and seriously improved video drivers capable of supporting DirectX. To give the new features a test drive I installed Autodesk Design Review, Revit 9.1 (trial version) and Bentley View on the virtual instance of Windows XP and had a play. All performed very well even with minimal RAM allocated for testing purposes. Quite possibly the only let down was that before you could start using the software the virtual machine first had to load Windows.

The screencast above illustrates the boot process, coherence mode, Design Review and Revit in action. The screencast was taken at a fairly low frame rate and YouTube just makes it all that worse. Please take my word for it that performance on a 1.83 Intel Core Duo iMac was fairly snappy even with only 256meg of RAM assigned to the VM. In a production environment you would certainly want to allocate at least 512meg of RAM to Parallels which would mean needing between 1.5/2gig of RAM in the Mac.

Whilst I would hardly recommend to architects that they should use their primary productivity application in a virtualised window, from the perspective of those Mac users who need to occasionally use a piece of Windows only software this level of functionality and performance from Parallels is perfect. Sure it is not nearly as quick as running natively, but then you don't have instant access to all of OSX's niceties that you begin to miss once forced to work on a Windows desktop for a little while.

Using OSX's automounter for transparent access to remote media

The one thing that really annoys me about OSX is its network share tool-set. With Windows you can map a network share to a drive letter, check a box that says 'Reconnect at login' and you are done. In OSX the process of reconnecting to a network share is not nearly as smooth as it should be.

The easy option: using Favourites

The simpliest way of achieving this task is to add the network share as a favourite. To do so go to Finder's menu and select Go -> Connect to Server. In the window enter the type and name of the network share (i.e. cifs://server/share) and press the + button to save it as a favourite. With the favourite saved open your account preferences from the Apple Menu -> System Preferences -> Accounts and go to the Login Items tab. Now open a Finder window and browse to your user directory -> Library -> Favorites and drag the relevant share icon onto the list of login items to have it mounted every time you login.

The problem of lost connections

There is one significant drawback with this technique in that if the connection to the share is lost for some reason (e.g. through sleep mode, server or network failure) OSX will not automatically reconnect to it. This becomes a real pain when trying to use a remote share as your primary iTunes music folder because when iTunes cannot find the share it restores your music directory to its default location. This leads to confusion, missing files and if you are not careful a destroyed music library.

The good news is the automount tool can come to your aid but the bad news is it is not straightforward to setup. Automount is common among the *NIX's (i.e. Linux, BSD, etc.) and works in the background to ensure your network shares are always available after restarts and network failures.

A tantalising prospect: Leopard supports ZFS

Leopard is the next version of OSX due for release mid-next year. When first introduced to Mac developers a number of significant Leopard features were purposefully kept 'secret'. Perhaps one feature hinted at that is now beginning to appear in the latest development builds is support for the ZFS filesystem.

ZFS is a fantastic file-system developed by Sun Microsystems for use initially in their Solaris operating system. ZFS is arguably the most advanced, generally available file-system which supports massive disk sizes, unlimited file attributes, sophisticated volume management (including snapshots) and great RAID support. If these reports are true then it maybe an indication of how Leopard's Time Machine functionality maybe finally implemented. ZFS would provide a fast and efficient snapshot mechanism that would work far more efficiently compared to creating multiple standard backups or even incremental backups as what would be required using a conventional file-system.

Even if ZFS is not used in Time Machine it is still great to see such a file system will be available for OSX especially at the server level where the majority of ZFS features are targeted. Hopefully in the future we will see ZFS take the role of OSX's default operating system allowing the venerable HFS+ format to be finally retired.

OmniPlan comes to the project management party

For the longest time finding a decent project management tool for OSX has been difficult, if not impossible depending on the features you require. Unfortunately even in the Windows world finding an alternative to the powerful but very expensive Microsoft Project is challenging. This is primarily because Microsoft Project pretty much owns the project management space in terms of the functionality provided and the level of lock-in demanded. Consequently with Microsoft not porting their application to OSX and alternatives lacking when it comes to functionality, usability and interoperability there is large void when it comes to the applicability of OSX to certain businesses. Fortunately the Omni Group have set out to change this fact with their first release of OmniPlan.


The OmniPlan workspace (click to enlarge)

The Omni Group have a long history of making great OSX software, in fact they started out developing software for the NEXTSTEP operating system - the forerunner of OSX. Without their OmniGraffle diagram/vector drawing package my life would be a whole lot harder. Omni Group software consistently gets even die hard Windows users drooling because of its ease of use, looks and depth of functionality. The reason why the Omni Group make excellent OSX software is because their products are designed specifically for the graphical and interface conventions of OSX. As their software is not simply a port of a Windows version or designed from the outset to run on multiple platforms the applications always look fantastic, integrate extensively with other OSX services and run as smooth as silk. I have been playing with OmniPlan and at this early stage it looks like the Omni Group have managed to maintain their high standards when it comes to functionality, usability and aesthetics.

Pages